Remember that time a few weeks ago, when my sister and I decided to give our mom a kitchen/great room makeover for Mothers’ Day? {You can read the entire saga, in order, here, here, here, here, here, here, and here, if you’re so inclined. [Looks like I get a lot of blog fodder out of one event, doesn’t it?]} We worked really hard for a week straight (plus some extra hours by my sister after I fled town), and the results…well…you decide for yourself.
p.s. I am pretty displeased with the way most of my “after” pictures turned out. They won’t make it to the pages of a magazine, or even Home Sweet Home, but they’re the best I’ve got. Maybe next time I visit Mesa, I’ll remember to switch my camera to the “indoor” setting. I hate when my idiocy negatively affects my blog posts. Curse me.
The Great Kitchen Re-do of 2009
by Camille and Anonymous Her Sister
West Wall, with the sofa that was a Mothers’ Day gift from years past (which I really wanted to slipcover, but hello! budget):

After:
 I know the lighting is poor—I can’t apologise enough for that. Nevertheless, you can sort of get a sense for the after-effect. We got the curtain rods for a steal at Home Depot (improving home improvement), we made the valances (with huge help from our inspired neighbor and my sister’s MIL) with $3.00/YARD!!! fabric from a secret source. The lamps we bought at yard sales and painted from brass to black (still need a shade for the one). The candlestick sconces we got from a yard sale, and attached to sweet cupboard doors we found from Goodwill. Side tables from Mesa Auction for $7.00 total. Entire wall: Less than $100.00.

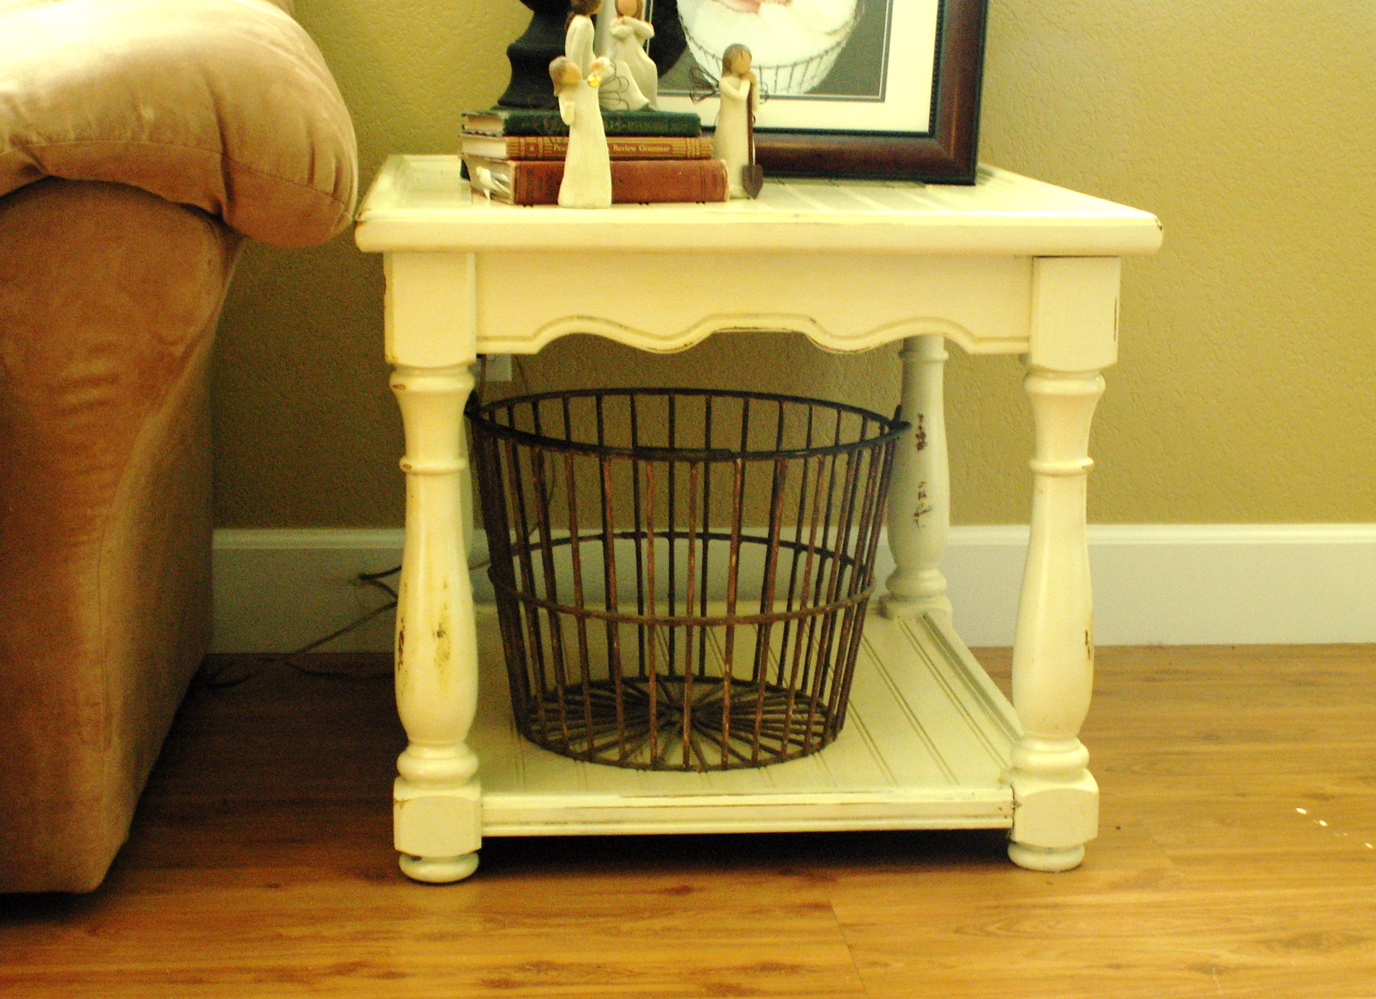
That awesome basket went on to be filled with toys after I left. The entire corner to the right of this side table is a kid zone, complete with…
 …a magnetic chalkboard accordion screen made out of closet doors from Goodwill (total of $20 after metallic and chalkboard paint). I wish I had a full-on photo of this awesome contraption. Thanks to my sister’s crafty husband, who attached them all together. Sweet.
 This is the most colour-true photo of the curtains and walls. Disregard the others, please.
 I’m pretty much cuckoo for cocoa puffs over the sweet way these valances a) hang, b) tie, and c) look altogether.

Moving around the corner to South Wall…this before photo accurately captures the general clutter and disarray. It’s a workhorse of the house, so we couldn’t change much, but we tried to keep things functional and lovely at the same time. (We did stash the superfluous printer, though.)


South Wall After:


Not much to say about this. The only things we added were the chair (Goodwill, $5.00), the basket (stolen from the back of my parents’ toilet, where it was holding magazines), the little black urn (once green, bought from a yard sale for fifty cents), and pens attached to dollar store flowers (in the urn). Total cost for area: I don’t know. Eight bucks?
East Wall Before:


Only addition were the plates, which were thrifted from Goodwills and yard sales, and hung with dollar store plate hangers. Total: $5.00. We also tidied up the fridge front. Go us.

East Wall, continued:
 As with the sofa, I really wanted to slipcover this overstuffed chair (which we couldn’t get rid of because it’s a favourite piece, and, I’ll admit, really lovely for a Sunday afternoon snooze), but we couldn’t fit that into the budget, even with $3.00/YARD!!! fabric. Maybe next Mothers’ Day.
 This is the new setup of the wall above the chair. It was created after I left, but I think my sister did a great job of it. She added chicken wire to the back of the tall picture frame, which now serves as a memo board of sorts. She also made that ragamuffin garden (she’s really good at them) as inspired by the Nester. The window is a family heirloom (I am a fan of family heirlooms). Plates, mirrors, and little black thing were thrifted. Total: Under $20.00.
And now, my favourite wall of the room…
…North Wall.

 Before, we had the big kitchen table, but no chairs to go with it (save those cool wooden ones which my dad brought into the marriage {actually, he brought an entire set, but the table and other four chairs were long ago sent to D.I., which I was thrilled about then, but am majorly bummed about now. Hindsight is 20/20.}). Nothing on the wall but a clock (a Christmas gift from us girls to our parents years ago {we tried}).
North Wall After…
 Please try and imagine this photo with a little less clutter on the table. It was amidst the “final details” day, and we needed to lay out everything we had to work with.
 This wall is where the majority of our money went. The door was $20.00 from D.I. (our one most expensive purchase). My sister’s husband made the shelf attachment (previewed here, you might recall) with wood and matching paint from Home Depot. All the knick-knacks were thrifted from yard sales and Goodwill, minus the angels, which my mom collects. The sofa we really wanted to reupholster, but settled, instead, on removing the chewed-up caning, painting chocolate brown, and giving the cushions a good cleaning. It’ll do for now. The cabinet on the left, from Mesa Auction ($7.00) started out dark brown wood. We painted it, added an applique (yard sale) and glass knobs to the drawer, and gave it a new life. Total: Probably around $100.00, after the shelf was made.
 I hot glued moss to that foam ball on a stick we found at Goodwill for fifty cents. A little bit of moss can make anything look boutique. Also, thanks to Chelsie for donating the cool white wire pendant to the cause—you’re a good friend.
 I really like the black stand with glass dome. My sister didn’t, but we got it for free at a yard sale, so it was destiny.


 My sister added the knick-knacks to the pedestal after I left—good call, sis.

…Details…

Lastly, here’s a sort-of-better shot of the finished table+chairs. The idea was to paint the chairs a nice sage green, and the table a contrasting butter yellow, but both colours ended up looking the same. It’s hard to tell the difference, but our hearts were true. Next time I go to Mesa, I’ll try to get better pictures of the table.


Whew! That was a lot to look at—think of how it was to actually create it. I came home with bruises on my legs that made me look like I’d gotten into a gang fight; we were exhausted for seven days straight; at one (or a hundred) point, my sister and I almost divorced each other…but it was all worth it. Maybe it’s not your style. Maybe you could have done better. But it’s my mom’s style, and we did our very best. We are really happy with the final product. So there, now can you sleep at night?
I love you, Mom! Happy Mothers’ Day.
17 Responses to As Promised…